How to Remove Blemishes From Photos (and Keep Real Skin)
A practical guide to removing blemishes from photos: what to remove and what to keep, how much retouching looks natural, and how to fix spots in seconds without blurry, plastic-looking skin.

Everyone gets spots. A breakout the week of a wedding, a red mark from shaving, a stress pimple right before a headshot. They’re temporary, completely normal, and also something many of us would rather not see in a photo we’ll keep for years.
Removing blemishes from photos is the digital version of a dab of concealer. Done well, nobody can tell. Done badly, it leaves smudgy patches and skin that looks like plastic. This guide shows you how to get the first result every time.
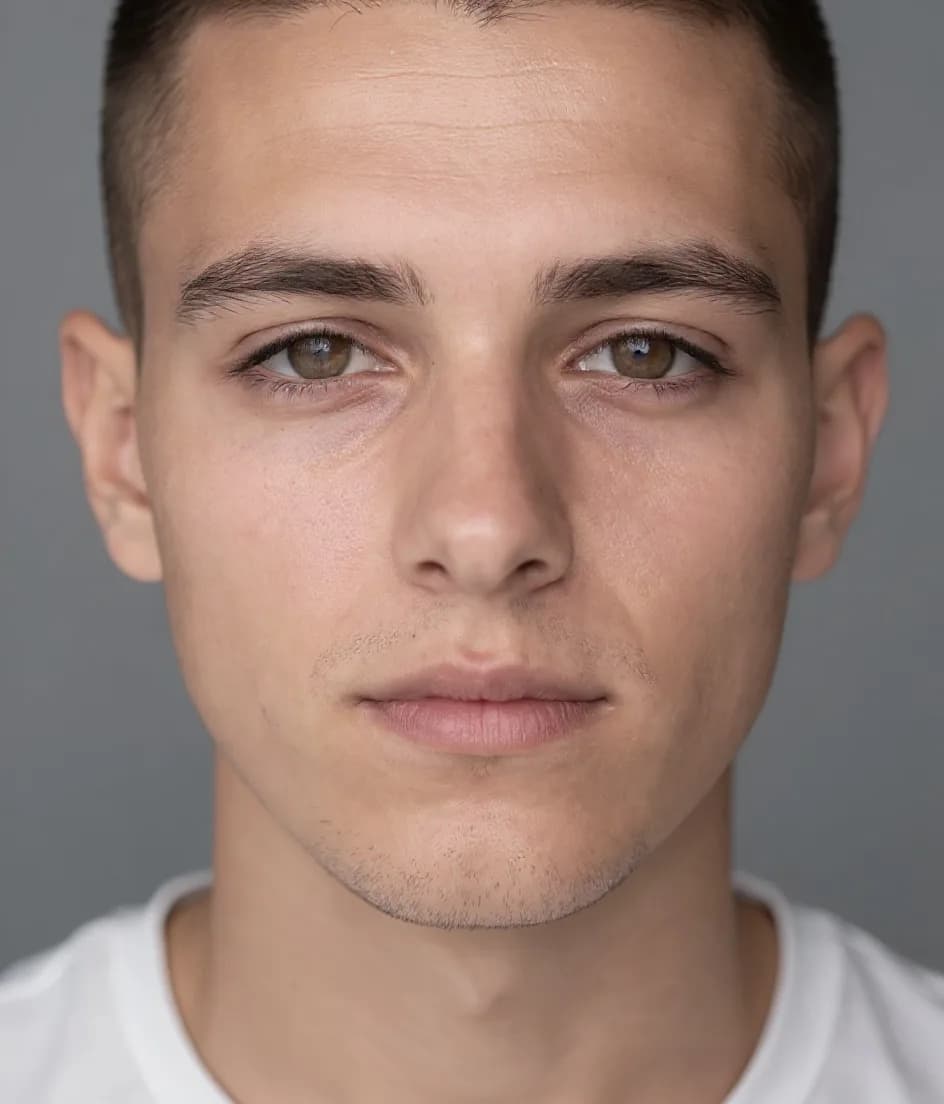
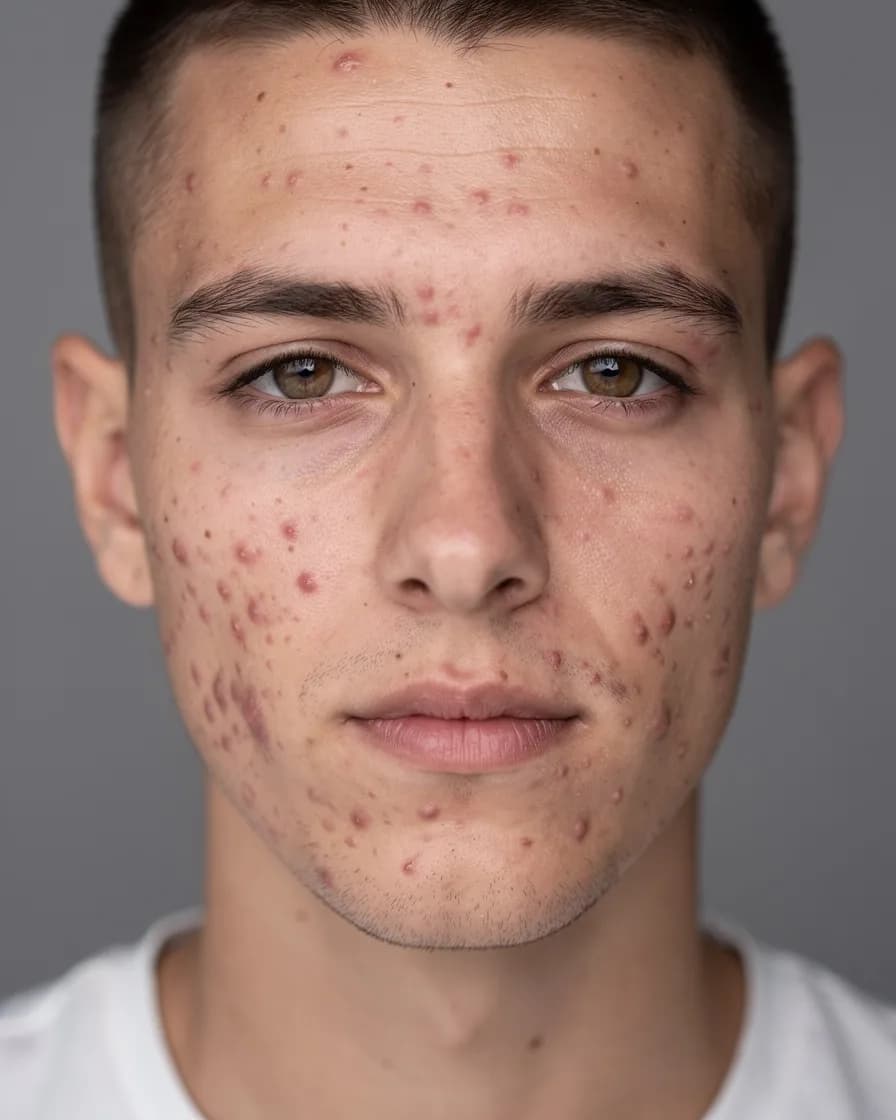
What counts as a blemish (and what to keep)
The best retouchers have a simple rule: remove what’s temporary, keep what’s you.
Usually fine to remove:
- Pimples, whiteheads and active breakouts
- Red marks and post-acne spots
- Small scratches, shaving bumps or bug bites
- Stray dry flakes and tiny bits of lint
Usually worth keeping:
- Freckles and beauty marks
- Moles (unless you specifically want to remove one)
- Laugh lines and natural creases
- Pores and fine skin texture
- Scars that are part of your story
Tip: if a friend would recognize you by it, think twice before removing it.
Why natural texture matters
Skin isn’t a flat surface. It has pores, tiny hairs, soft shine on the forehead and nose, and slight color changes across the face. When an edit wipes all of that away, the result looks airbrushed, even if every spot is gone.
That’s why a good blemish remover targets dark or red marks and leaves the surrounding detail alone. You want the spot to disappear and the skin around it to stay exactly as it was.
How to remove blemishes in FaceBodyTune
The skin retouch tool in FaceBodyTune removes spots and evens out redness while keeping pores and texture. It’s free and works live as you move the slider.
- Upload your photo. Open the free editor and add your picture. Sharp, well-lit photos give the best results.
- Go to Face, then Retouch. Find the Smooth skin slider.
- Set it to 30–40. This is enough to fade most small spots and redness without softening your features.
- Zoom to 100%. Look at the cheeks, chin and forehead. Spots should be gone or nearly gone, and pores should still be visible.
- Fine-tune. If a spot remains, go up in small steps of 5. If skin starts to look soft or waxy, come back down.
- Download. Save your photo in full quality.
Because basic retouching runs in your browser, your photo isn’t uploaded to a server or stored anywhere. Learn more on the blemish remover page.
Dealing with stubborn spots and scars
Some marks need a little more help:
- A single large pimple. Raise the slider just enough to fade it, then check that the rest of the face hasn’t lost detail. A spot that’s 80% faded looks more natural than a perfectly smooth patch.
- Acne scars and uneven texture. Small marks fade well. For deeper texture, an AI enhancement can rebuild skin detail, but keep it gentle.
- Redness around the nose or chin. A little smoothing combined with a natural light filter often evens tone better than more smoothing.
- Dark circles. These aren’t really blemishes. The Brighten face slider (start at 10–20) lifts shadows more naturally than smoothing.
- Shiny or oily patches. A little shine on the forehead, nose and cheekbones is healthy and looks good on camera. Only reduce it if a flash has turned it into a bright white patch, and even then aim to soften it rather than remove it.
- Spots near the eyes, lips or hairline. These areas have fine detail like lashes, lip lines and baby hairs. Check them closely after retouching, because they’re the first places where smoothing can look smudgy.
If you also want to soften fine lines, our guide on how to smooth skin in photos naturally covers the next step.
6 retouching mistakes to avoid
- Smoothing the whole face to 100. You’ll remove every spot, along with every pore. Start at 30.
- Forgetting other photos in the set. If one image in a carousel is heavily retouched and the next isn’t, people notice.
- Removing freckles by accident. If you love your freckles, keep the amount moderate and check they’re still there.
- Ignoring the neck and ears. If the face is flawless and the neck isn’t, the contrast gives the edit away.
- Editing on a dim phone screen. Spots look smaller on a dark screen. Check at full brightness.
- Retouching a blurry photo. Smoothing makes soft photos look even softer. Start with your sharpest shot or use the photo enhancer first.
Retouching for different photos
- Selfies and Instagram: 25–40 is plenty. Phone cameras already smooth skin a little.
- Professional headshots: 20–35. You want to look rested and polished, not filtered. See our LinkedIn headshot tips.
- Wedding and event photos: 30–45. Flash and harsh light make spots stand out more.
- Men’s portraits: Keep it lower, around 15–30, so beard texture and stubble stay crisp.
A note on keeping it real
Acne is incredibly common at every age, and nobody owes the internet perfect skin. Some people proudly post unretouched photos; others prefer to clear a breakout first. Both are completely valid.
There’s nothing wrong with hiding a temporary breakout. It’s the same choice as wearing concealer. Where honesty matters, such as a passport or ID photo, official rules usually forbid retouching that changes your appearance, so leave those untouched apart from lighting. For dating and professional profiles, removing a spot is fine; reshaping your face is a different story.
Before-you-post checklist
- Temporary spots are gone or faded.
- Freckles, moles and beauty marks you want to keep are still there.
- Pores are visible on the nose and cheeks at 100% zoom.
- Skin on the face matches the neck and ears.
- The photo still looks sharp.
- Other photos in the same set have a similar level of retouching.
Clear skin in a photo should look like a good skin day, not a different person. Keep the amount modest, protect your texture, and your photos will look polished and real.
Frequently asked questions
How do I remove a pimple from a photo for free?
Upload your photo to the FaceBodyTune editor and raise the Smooth skin slider in the Face panel. Small spots, marks and redness fade while the rest of your skin keeps its texture. Around 30–40 is a natural starting point.
Is it okay to remove acne from photos?
Yes, it’s your photo and your choice. Spots are temporary, so many people remove them the same way they would cover them with concealer. Permanent features like moles and freckles are worth keeping unless you really want them gone.
Can I remove acne scars from a photo?
Small scars and marks fade well with the retouch slider. Deeper texture changes may need an AI enhancement, but keep the result subtle so skin still looks real.
Why does my skin look blurry after removing blemishes?
The smoothing amount is too high. Lower it until you can see pores again, especially on the nose and cheeks.
Try it on your own photo
Free face and body edits right in your browser — plus AI tools when you want more.
Remove blemishesKeep reading

How to Try New Hairstyles on Your Face Before the Salon
Want to try new hairstyles on your face before you commit? Learn how to match cuts to your face shape, preview bobs, bangs and curls with AI, and bring the right reference to your stylist.

Seasonal Color Analysis: Find Your Season (Free 2026 Guide)
A practical guide to seasonal color analysis: what undertone, depth and contrast mean, how to tell Spring, Summer, Autumn and Winter apart, and how to test your season for free in daylight.

What Face Shape Do I Have? How to Tell in 2 Minutes
What face shape do I have? Learn how to measure your face at home, understand the six face shapes (oval, round, square, heart, oblong, diamond) and find the hairstyles, glasses and makeup that flatter each.