How to Change Eye Color in Photos (Realistic Results)
Curious how you’d look with green, hazel or ice-blue eyes? Learn how to change eye color in photos realistically: keeping iris detail, choosing a believable shade and avoiding the glowing, doll-eye look.

Eye color is one of the most fun edits to play with. Maybe you’ve always wondered how you’d look with green eyes, you’re choosing colored contacts for an event, or you want a character look for a creative shoot. Whatever the reason, a good eye color change can look surprisingly real.
A bad one looks like a cartoon. This guide covers how to change eye color in photos so it looks believable, which shades suit which natural eye colors, and the small details that make all the difference.
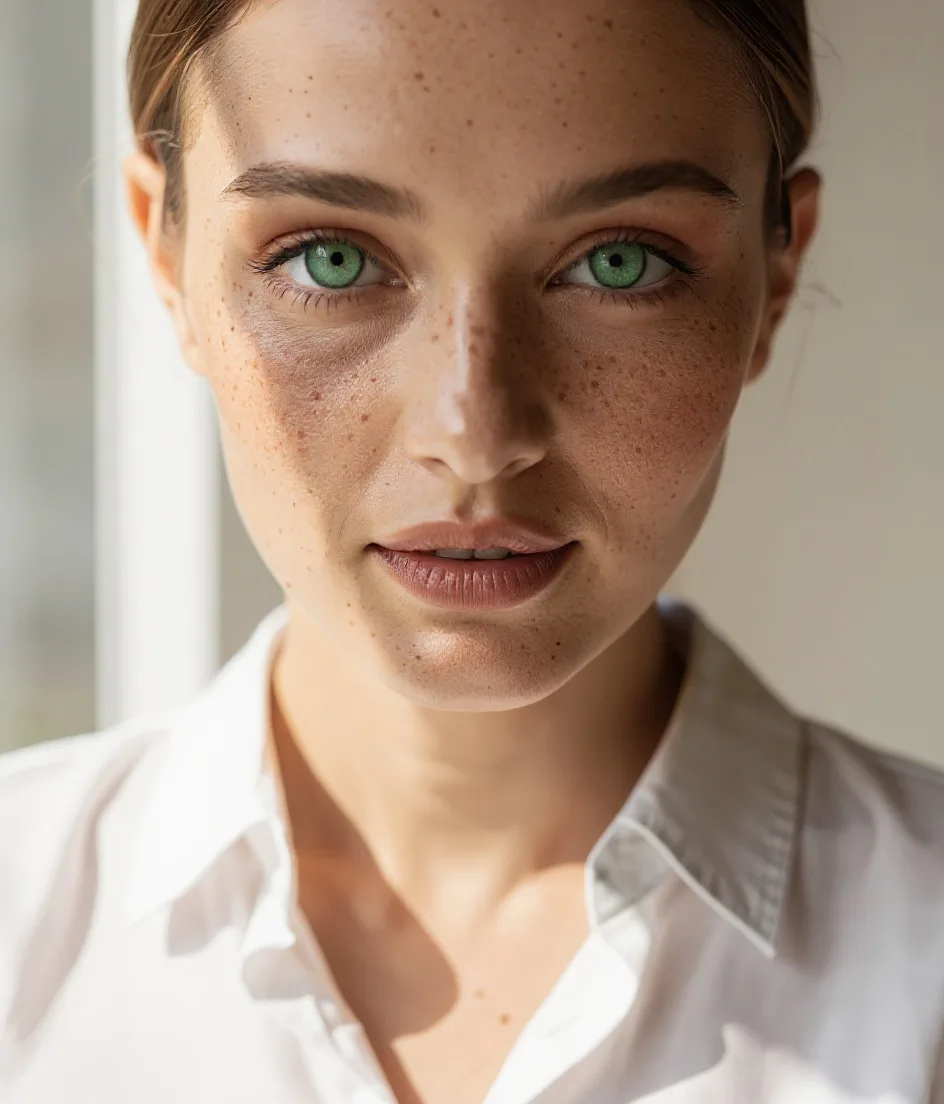
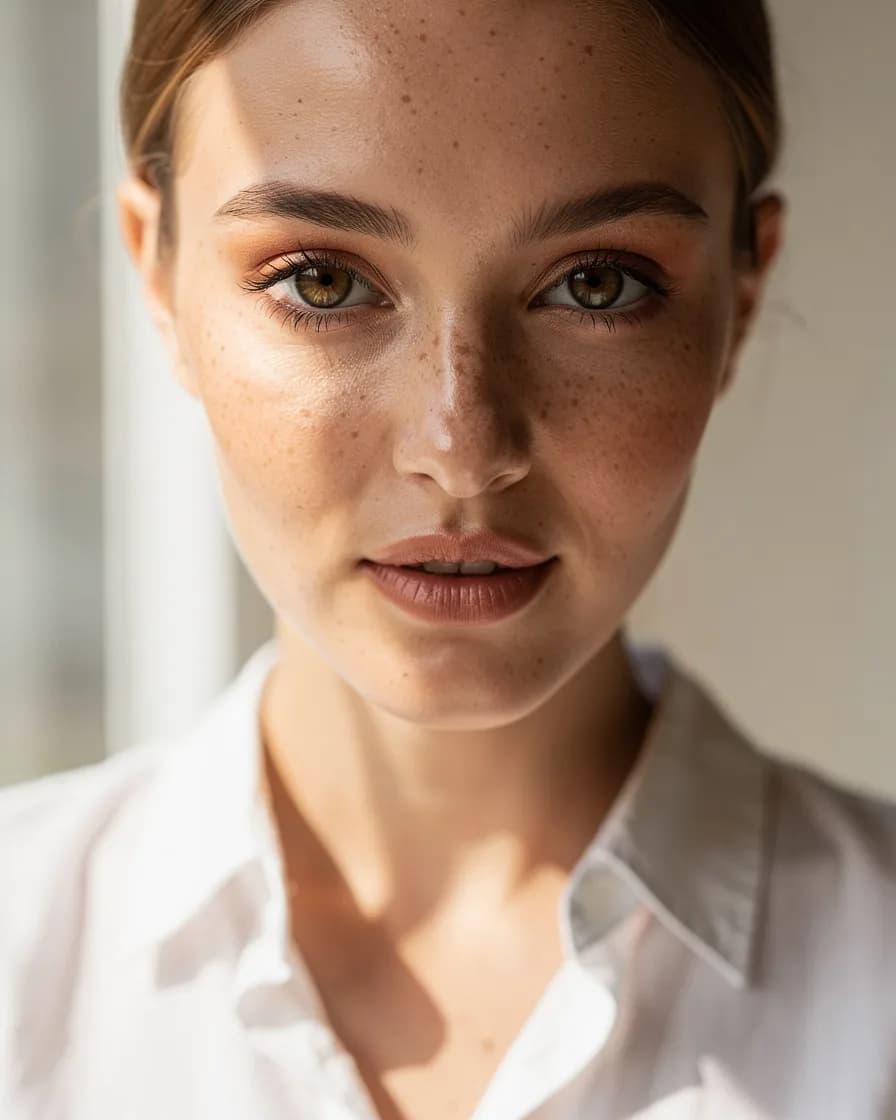
What makes eye color look real
Your iris isn’t one flat color. Look closely in a mirror and you’ll see:
- A darker outer ring (the limbal ring) around the edge of the iris
- Radial texture, like fine spokes running from the pupil outward
- Flecks and variation, often lighter around the pupil
- A catchlight, the small white reflection of the light source
- A black pupil that never changes color
A realistic eye color change keeps every one of these. It tints the iris while leaving the texture, ring, pupil and catchlight intact. That’s why a dedicated tool beats painting color on with a brush.
Choosing a shade that suits you
Some color changes look natural on almost everyone; others need more care.
If your eyes are dark brown
Dark eyes have lots of pigment, so the most believable changes stay warm or deep:
- Hazel or amber look natural and glowing.
- Deep green or emerald looks striking but believable at 50–65% intensity.
- Ice blue is the hardest to pull off from very dark eyes; keep intensity moderate.
If your eyes are light brown or hazel
You have the most options. Green, amber and soft gray all look natural, and blue works well at medium intensity.
If your eyes are blue, gray or green
Light eyes take color easily, so less intensity is needed. Try ocean blue, emerald or violet, and keep intensity lower than you think.
Tip: hold the shade up against your skin tone and hair. Warm skin and golden or red hair often suit hazel, amber and green; cool skin and ash or black hair suit gray, blue and violet. Our seasonal color analysis guide goes deeper.
How to change eye color in FaceBodyTune
The eye color tool detects your irises automatically and keeps real iris detail and a natural pupil. It’s free and works in real time.
- Upload your photo. Open the free editor and add a photo where your eyes are open and in focus.
- Open the Makeup panel. Scroll to Eye color.
- Pick a shade. Choose from hazel, emerald, light green, ice blue, ocean blue, gray, amber or violet, or tap the plus to choose any custom color.
- Lower the intensity. The default is 75%. For a subtle, natural change, try 50–65%.
- Zoom in. Check that the dark outer ring and texture are still visible and the pupil stays black.
- Download. Save your photo at full quality.
The edit happens in your browser, so your photo isn’t uploaded or kept. See more on the eye color changer page.
The best photos for eye color changes
Results depend heavily on the photo you start with:
- Eyes fully open. Half-closed or squinting eyes leave too little iris to work with.
- Sharp focus on the eyes. Portrait mode on most phones focuses on the nearest eye.
- Soft, even light. Window light shows iris texture beautifully.
- Minimal glare. If you wear glasses, tilt them slightly down to reduce reflections.
- Close enough. In a full-length photo the iris is only a few pixels wide; a head-and-shoulders shot works best.
Previewing colored contacts
If you’re choosing lenses for a wedding, a costume or everyday wear, take two photos: one in daylight and one in the kind of light you’ll be in at the event. Try the same shade in both. Colors that look subtle by a window can look much stronger under warm restaurant lighting, and the reverse is true for evening events. Save the versions you like and compare them side by side the next day with fresh eyes.
6 mistakes that make eye color look fake
- Intensity at 100%. Fully saturated color loses the iris texture and looks like a contact lens advert.
- Colored whites. If color spills onto the whites of your eyes, the photo looks wrong immediately.
- Missing outer ring. Without the darker edge, eyes look flat and doll-like.
- Glowing eyes. Very bright, light shades on dark-eyed photos can make eyes look lit from inside.
- Mismatched eyes. If one eye is in shadow, it should look slightly darker than the other.
- Different colors across a set. If you post several photos, keep the same shade and intensity.
Pair eye color with other edits
Eye color often looks best as part of a complete look:
- Brows and lashes stay as they are. They frame the new color.
- Add matching makeup. Warm bronze eyeshadow makes green and hazel eyes pop; soft plum and gray suit blue eyes. The makeup photo editor lets you try lipstick and blush to complete the look.
- Match a new hair color. If you’re trying a hair color too, check them together. Our guide on how to change hair color in photos explains how.
Using eye color changes responsibly
Changing your eye color is great for fun, creative shoots and trying a look before buying colored lenses. For photos where people expect to see the real you, such as a dating profile, a work headshot or an ID photo, keep your natural color. Passport and ID rules typically forbid edits that change your appearance.
If you’re previewing colored contacts, remember the photo is only a preview. Always get lenses fitted by an eye-care professional.
Before-you-post checklist
- The iris still shows texture and a darker outer ring.
- Pupils are black and catchlights are white.
- The whites of your eyes are untouched.
- Both eyes match, allowing for natural shadow.
- The shade suits your skin tone and hair.
- Intensity looks natural at the size people will see it.
Done with care, a new eye color can look like it was always yours. Play with a few shades, keep the intensity modest, and pick the one that makes you smile.
Frequently asked questions
How can I change my eye color in a photo for free?
Upload your photo to the FaceBodyTune editor, open the Makeup panel and choose a shade under Eye color, such as hazel, emerald or ice blue. Then lower the intensity until the color looks natural, usually around 50–75%.
How do I make changed eye color look realistic?
Keep the iris texture and dark outer ring, leave the pupil black, and choose a shade close to your natural depth. Dark brown eyes look most believable as hazel, amber or deep green.
Can I use an eye color changer to preview colored contacts?
It gives you a good idea of how a color suits your skin tone and hair, but real lenses look different on everyone, so treat it as a preview and talk to an eye-care professional before buying lenses.
Does it work if I wear glasses?
Usually, as long as your eyes are clearly visible and there isn’t strong glare on the lenses.
Try it on your own photo
Free face and body edits right in your browser — plus AI tools when you want more.
Change eye colorKeep reading

How to Try New Hairstyles on Your Face Before the Salon
Want to try new hairstyles on your face before you commit? Learn how to match cuts to your face shape, preview bobs, bangs and curls with AI, and bring the right reference to your stylist.

Seasonal Color Analysis: Find Your Season (Free 2026 Guide)
A practical guide to seasonal color analysis: what undertone, depth and contrast mean, how to tell Spring, Summer, Autumn and Winter apart, and how to test your season for free in daylight.

What Face Shape Do I Have? How to Tell in 2 Minutes
What face shape do I have? Learn how to measure your face at home, understand the six face shapes (oval, round, square, heart, oblong, diamond) and find the hairstyles, glasses and makeup that flatter each.